Java-常用的设计模式在Java中的应用
主要内容: 包括三个部分:第一部分:策略、代理模式、枚举、反射、注解;第二部分:观察者模式、内部类、输入输出;第三部分:模板方法模式、适配器模式、命令模式以及组合模式在JUnit中的应用;
第一部分:策略、代理模式、枚举、反射、注解
一个简单策略模式示例的实现
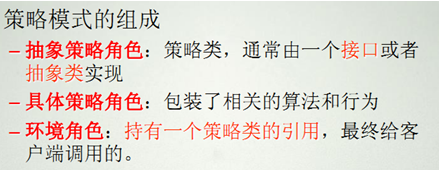
1.策略模式的组成
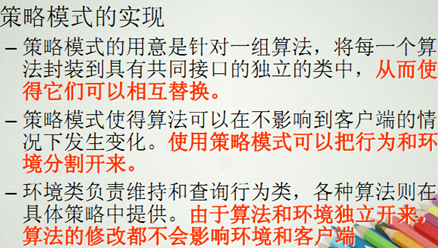
2.策略模式的实现
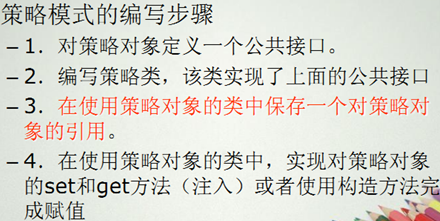
3.策略械的编写步骤
注:java中的Collections 就是策略模式的一个实现, 其中的很多方法通过传入不同的比较器,实现不同形式的比较。
4.定义一个实体类
package com.vvvv.strategy;
public class Person{
    private int id;
    private String name;
    private int age;
    …………get/set方法…………
}
5.定义策略接口
package com.vvvv.strategy;
import java.util.List;
public interface SortInterface{
    public void sort(List<Person> list);
}
6.具体的策略类
1.根据名字升序
package com.vvvv.strategy;
import java.util.Collections;
import java.util.Comparator;
import java.util.List;
public class UpNameSort implements SortInterface, Comparator<Person>{
    public void sort(List<Person> list) {
        Collections.sort(list, this);
    }
    public int compare(Person o1, Person o2){
        int result = o1.getName().compareTo(o2.getName());
        if(0 == result) {
            return o1.getId() - o2.getId();
        }
        return result;
    }
}
2.根据名字降序
package com.vvvv.strategy;
import java.util.Collections;
import java.util.Comparator;
import java.util.List;
public class DownNameSort implements SortInterface, Comparator<Person>{
    public void sort(List<Person> list) {
        Collections.sort(list, this);
    }
    public int compare(Person o1, Person o2) {
        int result = o2.getName().compareTo(o1.getName());
        if(0 == result) {
            return o1.getId() - o2.getId();
        }
        return result;
    }
}
3.应用的环境类
package com.vvvv.strategy;
import java.util.List;
public class Environment{
    private SortInterface sortInterface;
    public Environment(SortInterface sortInterface){
        this.sortInterface = sortInterface;
    }
    public Environment()
}
    public void setSortInterface(SortInterface sortInterface){
        this.sortInterface = sortInterface;
    }
    public void sort(List<Person> list){
        this.sortInterface.sort(list);
    }
}
4.客户端的调用
package com.vvvv.strategy;
import java.util.ArrayList;
import java.util.List;
public class Client{
    public static void main(String[] args) {
        Person p1 = new Person();
        p1.setName("Tom");
        p1.setId(1);
        p1.setAge(20);
        Person p2 = new Person();
        p2.setName("Tonny");
        p2.setId(2);
        p2.setAge(50);
        Person p3 = new Person();
        p3.setName("Tom");
        p3.setId(5);
        p3.setAge(30);
        Person p4 = new Person();
        p4.setName("ABC");
        p4.setId(8);
        p4.setAge(10);
        Person p5 = new Person();
        p5.setName("Xyz");
        p5.setId(9);
        p5.setAge(15);
        List<Person> list = new ArrayList<Person>();
        list.add(p1);
        list.add(p2);
        list.add(p3);
        list.add(p4);
        list.add(p5);
        Environment env = new Environment();
        UpNameSort uns = new UpNameSort();
        env.setSortInterface(uns);
        env.sort(list);
        for (int i = 0; i < list.size(); i++){
            Person p = list.get(i);
            System.out.println("id: " + p.getId() + ", name: " + p.getName()
                    + ", age:" + p.getAge());
        }
        System.out.println("--------------");
        DownNameSort dns = new DownNameSort();
        env.setSortInterface(dns);
        env.sort(list);
        for (int i = 0; i < list.size(); i++){
            Person p = list.get(i);
            System.out.println("id: " + p.getId() + ", name: " + p.getName()
                    + ", age:" + p.getAge());
        }
    }
}
枚举类型
1.枚举的每一个成员就是它一个实例,编译时确定
package com.vvvv.jdk5;
public enum Coin{
    penny("hello"), nickel("world"), dime("welcome"), quarter("hello world");
    private String value;
    public String getValue(){
        return value;
    }
    Coin(String value) {
        this.value = value;
    }
    public static void main(String[] args) {
        Coin coin = Coin.quarter;
        System.out.println(coin.getValue());
    }
}
2.构造EnumMap
package com.vvvv.jdk5;
import java.util.EnumMap;
import java.util.Map;
public class EnumMapDemo{
    public static void main(String[] args) {
        Map<Action, String> map = new EnumMap<Action, String>(Action.class);
        map.put(Action.TURN_RIGHT, "向右转");
        map.put(Action.SHOOT, "射击");
        map.put(Action.TURN_LEFT, "向左转");
        for (Action action : Action.values()){
            System.out.println(map.get(action));
        }
    }
}
enum Action{
    TURN_LEFT, TURN_RIGHT, SHO
}
3.构造EnumSet
package com.vvvv.jdk5;
import java.util.EnumSet;
import java.util.Iterator;
public class EnumSetDemo2{
    public static void main(String[] args) {
        EnumSet<FontConstant> enumSet = EnumSet.noneOf(FontConstant.class);
        enumSet.add(FontConstant.Bold);
        enumSet.add(FontConstant.Italilc);
        showEnumSet(enumSet);
    }
    public static void showEnumSet(EnumSet<FontConstant> enumSet) {
        for(Iterator<FontConstant> iter = enumSet.iterator(); iter.hasNext();){
            System.out.println(iter.next());
        }
    }
}
4.构造EnumList
package com.vvvv.jdk5;
import java.util.EnumSet;
import java.util.Iterator;
public class EnumSetDemo2{
    public static void main(String[] args) {
        EnumSet<FontConstant> enumSet = EnumSet.noneOf(FontConstant.class);
        enumSet.add(FontConstant.Bold);
        enumSet.add(FontConstant.Italilc);
        showEnumSet(enumSet);
    }
    public static void showEnumSet(EnumSet<FontConstant> enumSet) {
        for(Iterator<FontConstant> iter = enumSet.iterator(); iter.hasNext();){
            System.out.println(iter.next());
        }
    }
}
反射
1.使用forName
package com.vvvv.reflect;
import java.lang.reflect.Method;
public class DumpMethods{
    public static void main(String[] args) throws Exception{
        Class<?> classType = Class.forName(args[0]);
        Method[] methods = classType.getDeclaredMethods();
        for(Method method : methods) {
            System.out.println(method);
        }
    }
}
2.使用.class语法
package com.vvvv.reflect;
import java.lang.reflect.Method;
public class InvokeTester{
    public int add(int param1, int param2) {
        return param1 + param2;
    }
    public String echo(String message) {
        return "hello: " + message;
    }
    public static void main(String[] args) throws Exception{
        // InvokeTester test = new InvokeTester();
        // System.out.println(test.add(1, 2));
        // System.out.println(test.echo("tom"));
        Class<?> classType = InvokeTester.class;
        Object invokeTester = classType.newInstance();
        // System.out.println(invokeTester instanceof InvokeTester);
        Method addMethod = classType.getMethod("add", new Class[] { int.class,
                int.class });
        Object result = addMethod.invoke(invokeTester, new Object[]{1, 2});
        System.out.println((Integer)result);
        System.out.println("---------------------");
        Method echoMethod = classType.getMethod("echo", new Class[]{String.class});
        Object result2 = echoMethod.invoke(invokeTester, new Object[]{"tom"});
        System.out.println((String)result2);
    }
}
3.利用反射实现对象的拷贝
package com.vvvv.reflect;
import java.lang.reflect.Field;
import java.lang.reflect.Method;
public class ReflectTester{
    // 该方法实现对Customer对象的拷贝操作
    public Object copy(Object object) throws Exception{
        Class<?> classType = object.getClass();
        Object objectCopy = classType.getConstructor(new Class[] {}).newInstance(new Object[] {});
        // 获得对象的所有成员变量
        Field[] fields = classType.getDeclaredFields();
        for (Field field : fields) {
            String name = field.getName();
            String firstLetter = name.substring(0, 1).toUpperCase();// 将属性的首字母转换为大写
            String getMethodName = "get" + firstLetter + name.substring(1);
            String setMethodName = "set" + firstLetter + name.substring(1);
            Method getMethod = classType.getMethod(getMethodName, new Class[] {});
            Method setMethod = classType.getMethod(setMethodName, new Class[] { field.getType() });
            Object value = getMethod.invoke(object, new Object[] {});
            setMethod.invoke(objectCopy, new Object[] { value });
        }
        // 以上两行代码等价于下面一行
        // Object obj2 = classType.newInstance();
        // System.out.println(obj);
        return objectCopy;
    }
    public static void main(String[] args) throws Exception{
        Customer customer = new Customer("Tom", 20);
        customer.setId(1L);
        ReflectTester test = new ReflectTester();
        Customer customer2 = (Customer) test.copy(customer);
        System.out.println(customer2.getId() + "," + customer2.getName() + ","
                + customer2.getAge());
    }
}
class Customer{
    private Long id;
    private String name;
    private int age;
    public Customer(){
    }
    public Customer(String name, int age) {
        this.name = name;
        this.age = age;
    }
    …………set 、get方法…………
}
4.创建数组
示例1:
package com.vvvv.reflect;
import java.lang.reflect.Array;
public class ArrayTester1{
    public static void main(String[] args) throws Exception{
        Class<?> classType = Class.forName("java.lang.String");
        //创建一个数组长度为10的数组
        Object array = Array.newInstance(classType, 10);
        //设置数组的第5个元素
        Array.set(array, 5, "hello");
        //取出第5个元素
        String str = (String)Array.get(array, 5);
        System.out.println(str);
    }
}
示例2:
package com.vvvv.reflect;
import java.lang.reflect.Array;
public class ArrayTester2{
    public static void main(String[] args){
        int[] dims = new int[] { 5, 10, 15 };
        //创建一个长宽高分别为5、10、15的三维数组
        Object array = Array.newInstance(Integer.TYPE, dims);
        System.out.println(array instanceof int[][][]);
        //获得array的第1维下标为3的component
        Object arrayObj = Array.get(array, 3);
        //获得arrayObj的第1维下标为5的component,并赋给arrayObj
        arrayObj = Array.get(arrayObj, 5);
        //设置arrayObj第10个元素的值
        Array.setInt(arrayObj, 10, 37);
        int[][][] arrayCast = (int[][][]) array;
        System.out.println(arrayCast[3][5][10]);
        // System.out.println(Integer.TYPE);
        // System.out.println(Integer.class);
    }
}
代理模式
1.静态代理
示例1: 抽象角色
package com.vvvv.proxy;
public abstract class Subject{
    public abstract void request();
}
真实角色
package com.vvvv.proxy;
public class RealSubject extends Subject{
    public void request(){
        System.out.println("From real subject.");
    }
}
代理角色
package com.vvvv.proxy;
public class ProxySubject extends Subject{
    private RealSubject realSubject; //代理角色内部引用了真实角色
    public void request(){
        this.preRequest(); //在真实角色操作之前所附加的操作
        if(null == realSubject){
            realSubject = new RealSubject();
        }
        realSubject.request(); //真实角色所完成的事情
        this.postRequest(); //在真实角色操作之后所附加的操作
    }
    private void preRequest(){
        System.out.println("pre request");
    }
    private void postRequest(){
        System.out.println("post request");
    }
}
客户端
package com.vvvv.proxy;
public class Client{
    public static void main(String[] args){
        Subject subject = new ProxySubject();
        subject.request();
    }
}
2.动态代理
创建动态代理的步骤:
1.创建一个实现接口InvocationHandler的类,它必须实现invoke方法; 2.创建被代理的类以及接口; 3.通过Proxy的静态方法newProxyInstance(ClassLoader loader, Class[] interfaces,InvocationHandler h) 创建一个代理; 4.通过代理调用方法; 抽象角色与真实角色同上静态代理 动态代理句柄,可以动态的接收真实现角色、并调用真实角色的方法
package com.vvvv.dynamicproxy;
import java.lang.reflect.InvocationHandler;
import java.lang.reflect.Method;
/**
 该代理类的内部属性是Object类型,实际使用的时候通过该类的构造方法传递进来一个对象
 * 此外,该类还实现了invoke方法,该方法中的method.invoke其实就是调用被代理对象的将要
 * 执行的方法,方法参数是sub,表示该方法从属于sub,通过动态代理类,我们可以在执行真实对象的方法前后
 * 加入自己的一些额外方法。
 */
public class DynamicSubject implements InvocationHandler{
    private Object sub;
    public DynamicSubject(Object obj){
        this.sub = obj;
    }
    public Object invoke(Object proxy, Method method, Object[] args)
            throws Throwable{
        System.out.println("before calling: " + method);
        method.invoke(sub, args);
        System.out.println(args == null);
        System.out.println("after calling: " + method);
        return null;
    }
}
客户端
package com.vvvv.dynamicproxy;
import java.lang.reflect.InvocationHandler;
import java.lang.reflect.Proxy;
public class Client{
    public static void main(String[] args){
        RealSubject realSubject = new RealSubject();
        //动态代理句柄类拿到真实对象的引用,并构造一个对象
        InvocationHandler handler = new DynamicSubject(realSubject);
        Class<?> classType = handler.getClass();
        //生成代理对象
        Subject subject = (Subject) Proxy.newProxyInstance(
                classType.getClassLoader(),  //类加载器
                realSubject.getClass().getInterfaces(),  //真实对象实现的接口
                handler);
        subject.request();
        System.out.println(subject.getClass());
    }
}
自定义一个对Vector的动态代理句柄
package com.vvvv.dynamicproxy;
import java.lang.reflect.InvocationHandler;
import java.lang.reflect.Method;
import java.lang.reflect.Proxy;
import java.util.List;
import java.util.Vector;
public class VectorProxy implements InvocationHandler{
    //这里传入的真实对象将会是Vector的对象
    private Object realObj;
    public VectorProxy(Object obj){
        this.realObj = obj;
    }
    //构造代理对象
    public static Object factory(Object obj){
        Class<?> classType = obj.getClass();
        return Proxy.newProxyInstance(classType.getClassLoader(),
                classType.getInterfaces(), new VectorProxy(obj));
    }
    //通过代理角色执行方法调用
    public Object invoke(Object proxy, Method method, Object[] args)
            throws Throwable{
        System.out.println("before calling: " + method);
        if(null != args){
            //args是method的参数
            for(Object obj : args){
                System.out.println(obj);
            }
        }
        //调用代理角色的目标方法
        Object object = method.invoke(proxyObj, args);
        System.out.println("after calling: " + method);
        return object;
    }
    public static void main(String[] args){
        List v = (List)factory(new Vector());
        System.out.println(v.getClass().getName());
        //通过代理对象v间接调用vector的方法
        v.add("New");
        v.add("York");
        System.out.println(v);
        v.remove(0);
        System.out.println(v);
    }
}
注解
说明
1.自定义注解:当注解中的属性名为 value 时,在对其赋值时可以不指定属性的名称而直接写上属性值即可;除了value 以外的其他值都需要使用 name=value这种赋值方式,即明确指定给谁赋值。 2.当我们使用@interface 关键字定义一个注解时,该注解隐含地继承了java.lang.annotation.Annotation 接口;如果我们定义了一个接口,并且让该接口继承自 Annotation,那么我们所定义的接口依然还是接口而不是注解;Annotation 本身是接口而不是注解。可以与Enum 类比。
自定义注解
示例1
AnnotationTest
package com.vvvv.annotation;
public @interface AnnotationTest{
    String[] value1() default "hello";
    EnumTest value2();
}
enum EnumTest{
    Hello, World, Welcome;
}
AnnotationUsage
package com.vvvv.annotation;
@AnnotationTest(value2 = EnumTest.Welcome)
public class AnnotationUsage{
    @AnnotationTest(value1 = {"world", "ABCD"}, value2 = EnumTest.World)
    public void method(){
        System.out.println("usage of annotation");
    }
    public static void main(String[] args){
        AnnotationUsage usage = new AnnotationUsage();
        usage.method();
    }
}
@Retention及RetentionPolicy的使用
Retention可以指定注解的保留策略,包括Class,Runtime,Source三个范围域上。
示例2
MyAnnotation
package com.vvvv.annotation;
import java.lang.annotation.Retention;
import java.lang.annotation.RetentionPolicy;
@Retention(RetentionPolicy.CLASS)
public @interface MyAnnotation{
    String hello() default "vvvv";
    String world();
}
MyTest
package com.vvvv.annotation;
@MyAnnotation(hello = "beijing", world = "shanghai")
public class MyTest{
    @MyAnnotation(hello = "tianjin", world = "shangdi")
    @Deprecated
    @SuppressWarnings("unchecked")
    public void output(){
        System.out.println("output something!");
    }
}
利用反向射读取注解信息
示例3
AccessibleObject, Class, Constructor, Field, Method, Package都实现了AnnotatedElement接口. 定义Annotation时必须设定RetentionPolicy为RUNTIME,也就是可以在VM中读取Annotation信息。以下示例使用反射方式,读取出定义在类上的注解信息。
MyRefection
package com.vvvv.annotation;
import java.lang.annotation.Annotation;
import java.lang.reflect.Method;
public class MyReflection {
    public static void main(String[] args) throws Exception {
        MyTest myTest = new MyTest();
        Class<MyTest> c = MyTest.class;
        Method method = c.getMethod("output", new Class[]{});
        //判断这个注解上是否存在MyAnnotation的注解修饰
        if (method.isAnnotationPresent(MyAnnotation.class)) {
            method.invoke(myTest, new Object[]{});
            //获得MyAnnotation注解,并取出MyAnnotation注解的值
            MyAnnotation myAnnotation = method.getAnnotation(MyAnnotation.class);
            String hello = myAnnotation.hello();
            String world = myAnnotation.world();
            System.out.println(hello + ", " + world);
        }
        //获得这个方法的所有注解
        Annotation[] annotations = method.getAnnotations();
        for (Annotation annotation : annotations) {
            //输出的内容由注解的RetentionPolicy决定
            System.out.println(annotation.annotationType().getName());
        }
    }
}
@Target限定注解的使用时机
使用@Target定义注解的使用时机要指定java.lang.annotation.ElementType,是AccessibleObject,还是 Class, 或者Constructor, Field, Method, Package.
@Retention要搭配一个RetentionPolicy枚举类型, 同样@Target要搭配一个ElmentType 枚举类型。
示例4
MyTarget
package com.vvvv.annotation;
import java.lang.annotation.ElementType;
import java.lang.annotation.Target;
@Target(ElementType.METHOD)
public @interface MyTarget{
    String value();
}
MyTargetTest
package com.vvvv.annotation;
public class MyTargetTest{
    @MyTarget("hello")
    public void doSomething(){
        System.out.println("hello world");
    }
}
1.使用java.lang.annotation.Documented修改注解,则可以将注解的信息加入到API文档中。
2.预设的父类别中的Annotation并不会继承到子类别中,但可以在定义Annotation型态时加上java.lang.annotation.Inherited型态的Annotation.
第二部分:观察者模式、内部类、输入输出
观察者模式
说明
观察者模式的组成
– 抽象主题角色:把所有对观察者对象的引用保存在一个集合中,每个抽象主题角色都可以有任意数量的观察者。抽象主题提供一个接口,可以增加和删除观察者角色。一般用一个抽象类或接口来实现。
抽象观察者角色:为所有具体的观察者定义一个接口,在得到主题的通知时更新自己。 – 具体主题角色:在具体主题内部状态改变时,给所有登记过的观察者发出通知。具体主题角色通常用一个子类实现。
– 具体观察者角色:该角色实现抽象观察者角色所要求的更新接口,以便使本身的状态与主题的状态相协调。如果需要,具体观察者角色可以保存一个指向具体主题角色的引用。通常用一个子类实现。
Watched.java
package com.vvvv.observer;
//抽象主题角色
public interface Watched{
    //添加观察者
    public void addWatcher(Watcher watcher);
    //删除观察者
    public void removeWatcher(Watcher watcher);
    //传入指定的字符串,通知观察者
    public void notifyWatchers(String str);
}
Watcher.java
package com.vvvv.observer;
//抽象观察者
public interface Watcher{
    //根据接收到的字符串,更新自已
    public void update(String str);
}
ConcreteWatched.java
package com.vvvv.observer;
import java.util.ArrayList;
import java.util.List;
//具体的主题角色
public class ConcreteWatched implements Watched{
    //观察者集合
    private List<Watcher> list = new ArrayList<Watcher>();
    public void addWatcher(Watcher watcher){
        list.add(watcher);
    }
    public void removeWatcher(Watcher watcher){
        list.remove(watcher);
    }
    public void notifyWatchers(String str){
        //遍历观察者集合,并调用观察者的更新方法
        for(Watcher watcher : list){
            watcher.update(str);
        }
    }
}
ConcreteWatcher.java
package com.vvvv.observer;
//具体的观察者
public class ConcreteWatcher implements Watcher{
    //更新
    public void update(String str){
        System.out.println(str);
    }
}
客户端测试类Test.java
package com.vvvv.observer;
        //客户端
public class Test{
    public static void main(String[] args){
        //定义一个美女作为主题
        Watched girl = new ConcreteWatched();
        //定义三个追求者作为观察者
        Watcher watcher1 = new ConcreteWatcher();
        Watcher watcher2 = new ConcreteWatcher();
        Watcher watcher3 = new ConcreteWatcher();
        //将三个追求者添加到对美女的粉丝列表中
        girl.addWatcher(watcher1);
        girl.addWatcher(watcher2);
        girl.addWatcher(watcher3);
        //当美女发出消息说:"开心,爽",将会触发粉丝也跟着说:"开心,爽"
        girl.notifyWatchers("开心,爽");
        //美女从粉丝列表删除第二个粉丝
        girl.removeWatcher(watcher2);
        //美女再次发出消息说
        girl.notifyWatchers("不爽");
    }
}
Observable 与 Observer 的应用
/**
 * An object may be observed by two or more
 * observers.
 */
import java.util.*;
        // This is the class being observed.
class BeingWatched extends Observable {
    void counter(int period) {
        for (; period >= 0; period--) {
            setChanged();
            notifyObservers(new Integer(period));
            try {
                Thread.sleep(100);
            }catch (InterruptedException e) {
                System.out.println("Sleep interrupted");
            }
        }
    }
}
        // This is the first observing class.
class Watcher1 implements Observer {
    public void update(Observable obj, Object arg) {
        System.out.println("watcher1's update() called, count is " +
                ( (Integer) arg).intValue());
    }
}
        // This is the second observing class.
class Watcher2 implements Observer {
    public void update(Observable obj, Object arg) {
        if ( ( (Integer) arg).intValue() <= 5) {
            System.out.println("watcher2's update() called, count is " +
                    ( (Integer) arg).intValue());
        }
        // Ring bell when done
        if ( ( (Integer) arg).intValue() == 0) {
            System.out.println("Done" + '\7');
        }
    }
}
/**
 * client
 */
public class TwoObservers {
    public static void main(String args[]) {
        BeingWatched observed = new BeingWatched();
        Watcher1 observing1 = new Watcher1();
        Watcher2 observing2 = new Watcher2();
        // add both observers
        observed.addObserver(observing1);
        observed.addObserver(observing2);
        observed.counter(10);
    }
}
内部类
静态内部类
package com.vvvv.innerclass;
class StaticInner{
    private static int a = 4;
//静态内部类
    public static class Inner{
        public void test(){
            System.out.println(a);
        }
    }
}
public class StaticInnerClassTest{
    public static void main(String[] args){
        StaticInner.Inner inner = new StaticInner.Inner();
        inner.test();
    }
}
成员内部类
package com.vvvv.innerclass;
class MemberInner{
    private int a = 4;
    //成员内部类
    public class Inner2{
        private int a = 5;
        public void doSomething(){
            //访问内部类的变量a
            System.out.println(this.a);
            System.out.println(a);
            //访问外部类的变量a
            System.out.println(MemberInner.this.a);
        }
    }
    public void method(){
        Inner2 inner = this.new Inner2();
    }
}
public class MemberInnerClassTest{
    public static void main(String[] args){
        MemberInner.Inner2 inner = (new MemberInner()).new Inner2();
        inner.doSomething();
    }
}
局部内类部
package com.vvvv.innerclass;
class LocalInner{
    public void doSomething(){
        //外部类的变量要想被局部内部类访问到,必须定义成终态
        final int a = 4;
        //局部内部类
        class Inner3{
            public void test(){
                System.out.println(a);
            }
        }
        new Inner3().test();
    }
}
public class LocalInnerClassTest{
    public static void main(String[] args){
        LocalInner localInner = new LocalInner();
        localInner.doSomething();
    }
}
匿名内部类
package com.vvvv.innerclass;
import java.util.Date;
public class AnonymousInnerClassTest{
    @SuppressWarnings("deprecation")
    public String get(Date date){
        return date.toLocaleString();
    }
    public static void main(String[] args){
        AnonymousInnerClassTest test = new AnonymousInnerClassTest();
        //String str = test.get(new Date());;
        //System.out.println(str);
        //匿名内部类
        String str = test.get(new Date(){
            public String toLocaleString(){
                return "hello world";
            }
        });
        System.out.println(str);
    }
}
输入输出 I/O
使用FilenameFilter
– 希望能够限制由list( )方法返回的文件数目,使它仅返回那些与一定的文件名方式或者过滤(filter)相匹配的文件。为达到这样的目的,必须使用list( )的第二种形式 (方法重载)
– String[ ] list(FilenameFilter FFObj)
– 该形式中,FFObj是一个实现FilenameFilter接口的类的对象
FilenameFilter仅定义了一个方法,accept( )。该方法被列表中的每个文件调用一次。它的通常形式如下:boolean accept(File directory, String filename)
当被directory 指定的目录中的文件(也就是说,那些与filename 参数匹配的文件)包含在列表中时,accept( )方法返回true ,当这些文件没有包括在列表中时,accept( )返回false.
package com.vvvv.io;
import java.io.File;
import java.io.FilenameFilter;
public class FileTest7{
    public static void main(String[] args){
        File file = new File("C:\\abc\\xyz\\hello");
        //策略模式的应用
        String[] names = file.list(new FilenameFilter(){
            public boolean accept(File dir, String name){
                if(name.endsWith(".txt")){
                    return true;
                }
                return false;
            };
        });
        for(String name : names){
            System.out.println(name);
        }
    }
}
用InpubStream读取文件
package com.vvvv.io2;
import java.io.FileInputStream;
import java.io.InputStream;
public class InputStreamTest1{
    public static void main(String[] args) throws Exception{
        InputStream is = new FileInputStream("c:/hello.txt");
        byte[] buffer = new byte[200];
        int length = 0;
//每次从流中读取200个字节放到buffer里,如果最后一次不足200,length即等于
//实际读到的字节数,如果读指针已经到达文件尾,则返回-1
        while(-1 != (length = is.read(buffer, 0, 200))){
            //将buffer中从指定位置0开始、长度为length的字节转换成字符串
            String str = new String(buffer,0, length);
            System.out.println(str);
        }
        is.close();
    }
}
递归列出指定目录下的子目录与文件
package com.vvvv.io2;
import java.io.File;
import java.util.ArrayList;
        //列出指定目录下的目录与文件的层次
public class ListAllTest{
        //用于判断目录或文件所处的层次
    private static int time;
        // 递归的方法
    public static void deepList(File file){
        if (file.isFile() || 0 == file.listFiles().length){
            return;
        }else{
            File[] files = file.listFiles();
            files = sort(files);
            for(File f : files){
                StringBuffer output = new StringBuffer();
                if(f.isFile()){
                    output.append(getTabs(time));
                    output.append(f.getName());
                }else{
                    output.append(getTabs(time));
                    output.append(f.getName());
                    output.append("\\");
                }
                System.out.println(output);
                if(f.isDirectory()){
                    time++;
                    deepList(f);
                    time--;
                }
            }
        }
    }
        // 整理文件数组,使得目录排在文件之前
    private static File[] sort(File[] files){
        ArrayList<File> sorted = new ArrayList<File>();
        // 寻找到所有的目录
        for (File f : files){
            if (f.isDirectory()){
                sorted.add(f);
            }
        }
        // 寻找到所有的文件
        for (File f : files){
            if (f.isFile()){
                sorted.add(f);
            }
        }
        return sorted.toArray(new File[files.length]);
    }
        //判断需要加多少 tab的方法
    private static String getTabs(int time){
        StringBuffer buffer = new StringBuffer();
        for(int i = 0; i < time; i++){
            buffer.append("\t");
        }
        return buffer.toString();
    }
    public static void main(String[] args){
        File file = new File("C:\\Projects\\wsclient");
        deepList(file);
    }
}
第三部分:模板方法模式、适配器模式、命令模式以及组合模式在JUnit中的应用
单元测试JUnit
说明
1.JUnit4 的执行的一般流程:
a)首先获得待测试类所对应的 Class对象。 b)然后通过该 Class对象获得当前类中所有 public 方法所对应的 Method 数组。 c)遍历该Method数组,取得每一个Method对象 d)调用每个Method 对象的isAnnotationPresent(Test.class)方法,判断该方法是否被 Test注解所修饰。 e)如果该方法返回true,那么调用method.invoke()方法去执行该方法,否则不执行。2.测试类的私有方法时可以采取两种方式:
1)修改方法的访问修饰符,将 private 修改为 default 或 public(但不推荐采取这种方式)。 2)使用反射在测试类中调用目标类的私有方法(推荐)
单元测试DeleteAll
package com.vvvv.junit;
import java.io.File;
import junit.framework.Assert;
import junit.framework.TestCase;
public class DeleteAllTest extends TestCase{
    public void testDeleteAll(){
        File file = null;
        try{
            file = new File("test.txt");
            file.createNewFile();
            DeleteAll.deleteAll(file);
        }catch (Exception ex){
            Assert.fail();
        }
        boolean isExist = file.exists();
        Assert.assertFalse(isExist);
    }
    /**
     * 构造的是一个目录结构,其结构表示如下
     *
     * d
     * / \
     * / \
     * d1 d2
     * / \
     * / \
     *s1 s2
     *
     */
    public void testDeleteAll2(){
        File directory = null;
        try{
            directory = new File("dir");
            directory.mkdir();
            File file1 = new File(directory, "file1.txt");
            File file2 = new File(directory, "file2.txt");
            file1.createNewFile();
            file2.createNewFile();
            File d1 = new File(directory, "d1");
            File d2 = new File(directory, "d2");
            d1.mkdir();
            d2.mkdir();
            File subFile1 = new File(d1, "subFile1.txt");
            File subFile2 = new File(d2, "subFile2.txt");
            subFile1.createNewFile();
            subFile2.createNewFile();
            DeleteAll.deleteAll(directory);
        }
        catch(Exception ex){
            Assert.fail();
        }
        Assert.assertNotNull(directory);
        String[] names = directory.list();
        Assert.assertEquals(0, names.length);
        directory.delete();
    }
}
基于注解修饰
3.在JUnit 4中, 通过@Before注解实现与JUnit 3.8中的setUp方法同样的功能,通过@After 注解实现与 JUnit 3.8 中的tearDown 方法同样的功能。
4.在JUnit 4 中,使用@BeforeClass与@AfterClass 注解修饰一个 public static void no-arg 的方法,这样被@BeforeClass 注解所修饰的方法会在所有测试方法执行前执行;被@AfterClass注解所修饰的方法会在所有测试方法执行之后执行。
@BeforeClass
public void globalInit(){
        System.out.println("globalInit invoked!");
        }
@AfterClass
public static void globalDestroy(){
        System.out.println("globalDestroy invoked!");
        }
5.@Ignore 注解可用于修饰测试类与测试方法,当修饰测试类时,表示忽略掉类中的所有测试方法;当修饰测试方法时,表示忽略掉该测试方法。
6.对测试设置期望抛出异常与超时限制,示例: 参数化测试
7.参数化测试(Parameters):当一个测试类使用参数化运行器运行时,需要在类的声明处加上@RunWith(Parameterized.class)注解,表示该类将不使用 JUnit内建的运行器运行,而使用参数化运行器运行;在参数化运行类中提供参数的方法上要使用@Parameters 注解来修饰,同时在测试类的构造方法中为各个参数赋值(构造方法是由 JUnit 调用的),最后编写测试类,它会根据参数的组数来运行测试多次。
package com.vvvv.junit4;
import static org.junit.Assert.assertEquals;
import java.util.Arrays;
import java.util.Collection;
import org.junit.Before;
import org.junit.Test;
import org.junit.runner.RunWith;
import org.junit.runners.Parameterized;
import org.junit.runners.Parameterized.Parameters;
@RunWith(Parameterized.class)
public class ParametersTest{
    private int expected;
    private int input1;
    private int input2;
    private Calculator cal;
    @Parameters
    public static Collection prepareData(){
        Object[][] object = { { 3, 1, 2 }, { -4, -1, -3 }, { 5, 2, 3 },
                { 4, -4, 8 } };
        return Arrays.asList(object);
    }
    @Before
    public void setUp(){
        cal = new Calculator();
    }
    //构造方法
    public ParametersTest(int expected, int input1, int input2){
        this.expected = expected;
        this.input1 = input1;
        this.input2 = input2;
    }
    @Test
    public void testAdd(){
        assertEquals(this.expected, cal.add(this.input1, this.input2));
    }
}
测试套件
TestSuite(测试套件):可以将多个测试组合到一起,同时执行多个测试,如下示例:
Junit 3的测试套件
package com.vvvv.junit;
import junit.extensions.RepeatedTest;
import junit.framework.Test;
import junit.framework.TestCase;
import junit.framework.TestSuite;
public class TestAll extends TestCase{
    public static Test suite(){
//测试套件
        TestSuite suite = new TestSuite();
//执行几个测试类
        suite.addTestSuite(CalculatorTest.class);
        suite.addTestSuite(LargestTest.class);
        suite.addTestSuite(DeleteAllTest.class);
        suite.addTest(new RepeatedTest(new CalculatorTest("testSubtract"), 20));
        return suite;
    }
}
Junit 4测试套件
在Junit 4 中使用Suite运行器允许你手动构建一个包含多个测试类的套件,相当于在Junit 3中的static Test suite()方法,使用@Runwith(Suite.class)和@SuiteClasses(TestClass.class, …)注解修饰即可,@Runwith(Suite.class)修饰指明测试的类用Suite套件运行器运行,@SuiteClass指明使用哪些测试套件。
package com.vvvv.junit4;
import org.junit.runner.RunWith;
import org.junit.runners.Suite;
@RunWith(Suite.class)
@Suite.SuiteClasses({ CalculatorTest.class, LargestTest.class,
        ParametersTest.class })
public class TestAll{
}
在 JUnit 4 中,如果想要同时运行多个测试,需要使用两个注解:@RunWith(Suite.class)以及@Suite.SuiteClasses(),通过这两个注解分别指定使用 Suite 运行器来运行测试,以及指定了运行哪些测试类,其中的@SuiteClasses 中可以继续指定 Suite,这样 JUnit 会再去寻找里面的测试类,一直找到能够执行的 Test Case 并执行之。
package com.vvvv.junit4;
import org.junit.runner.RunWith;
import org.junit.runners.Suite;
@RunWith(Suite.class)
@Suite.SuiteClasses(TestAll.class)
public class TestAll2{
}
在Junit的测试类中,每一个测试方法的运行都会重新执行setUp 与tearDown方法,例如以下测试类CalculatorTest中,如果有n个测试方法,则setUp与tearDown方法就会执行n次,结果会输出n个1。
public class CalculatorTest extends TestCase{
    private Calculator cal;
    private int count;
    public CalculatorTest(String name){
        super(name);
    }
    @Override
    public void setUp() throws Exception{
        System.out.println(++count);
        cal = new Calculator();
    }
    @Override
    public void tearDown() throws Exception{
    }
    public void testAdd(){
        int result = cal.add(1, 2);
        Assert.assertEquals(3, result);
    }
……
    public static void main(String[] args){
        //以awt ui风格来运行CalculatorTest测试类
        //junit.awtui.TestRunner.run(CalculatorTest.class);
        //以swing ui风格来运行CalculatorTest测试类
        junit.swingui.TestRunner.run(CalculatorTest.class);
    }
}
模板方法模式(Template Method)
说明
定义 定义一个操作中的算法骨架,而将一些步骤延伸到子类中去,使得子类可以不改变一个算法的结构,即可重新定义该算法的某些特定步骤。这里需要复用的是算法的结构,也就是步骤,而步骤的实现可以在子类中完成。
使用场合 1)一次性实现一个算法的不变部分,并且将可变的行为留给子类来完成。 2)各子类公共的行为应该被提取出来并集中到一个公共父类中以避免代码的重复。首先识别现有代码的不同之处,并且把不同部分分离为新的操作,最后,用一个调用这些新的操作的模板方法来替换这些不同的代码。 3)控制子类的扩展
模板方法模式的组成 – 父类角色:提供模板。 – 子类角色:为模板提供实现。 模板方法模式在Junit中具体应用,可以在TestCase类中,runBare()方法,首先是执行setUp方法,然后执行runTest方法,最后执行tearDown方法。
模板方法模式示例
模板抽象类
package com.vvvv.pattern.templatemethod;
public abstract class AbstractClass{
    public void template(){
        this.method1();
        this.method2();
        this.method3();
    }
    public abstract void method1();
    public abstract void method2();
    public abstract void method3();
}
对模板的具体实现类
package com.vvvv.pattern.templatemethod;
public class ConcreteClass extends AbstractClass{
    @Override
    public void method1(){
        System.out.println("step 1");
    }
    @Override
    public void method2(){
        System.out.println("step 2");
    }
    @Override
    public void method3(){
        System.out.println("step 3");
    }
}
调用客户端
package com.vvvv.pattern.templatemethod;
public class Client{
    public static void main(String[] args){
        AbstractClass ac = new ConcreteClass();
        ac.template();
    }
}
适配器模式
说明
将一个类的接口转换成客户希望的另外一个接口。Adapter模式使得原本由于接口不兼容而不能一起工作的那些类可以一起工作。
适配器模式的构成 目标抽象角色(Target)– 定义客户要用的特定领域的接口 适配器(Adapter)– 调用另一个接口,作为一个转换器 被适配角色(Adaptee)– 定义一个接口,Adapter需要接入 客户端(Client)– 协同对象符合Adapter适配器
适配器的分类 有两种类型的适配器模式 – 类适配器(采取继承的方式) – 对象适配器(采取对象组合的方式)推荐使用这种方式
适配器模式示例(类适配器,通过继承)
抽象目标角色
package com.vvvv.pattern.adapter;
//目标抽象角色
public interface Target{
    public void method1();
}
被适配角色
package com.vvvv.pattern.adapter;
//要被适配的角色
public class Adaptee{
//被适配的目标方法
    public void method2(){
        System.out.println("目标方法");
    }
}
适配器
package com.vvvv.pattern.adapter;
//适配器角色(通过继承要被适配的类,实现该适配器对它的适配)
public class Adapter extends Adaptee implements Target{
//通过适配器角色的method1间接调用目标方法
    @Override
    public void method1(){
        this.method2();
    }
}
客户端
package com.vvvv.pattern.adapter;
//客户端
public class Client{
    public static void main(String[] args){
//通过初始化一个适配器调用目标
        Target target = new Adapter();
//调用目标方法
        target.method1();
    }
}
适配器模式在Junit当中的应用
在Junit 中,runTest方法即是适配器的方法,它适配我们具体的测试方法,即通过它,间接的调用了测试类中的测试方法;在runBare方法中,通过runTest方法将我们自己编写的testXXX方法进行了适配,使得JUnit 可以执行我们自己编写的 TestCase,runTest 方法的实现如下:
在runTest 方法中,首先获得我们自己编写的 testXXX 方法所对应的Method 对象(不带参数),然后检查该 Method 对象所对应的方法是否是 public 的,如果是则调用Method 对象的invoke 方法来去执行我们自己编写的 testXXX方法。
对象组合方式
抽象目标角色
package com.vvvv.pattern.adapter2;
//抽象目标角色
public interface Target{
    public void method1();
}
被适配者
package com.vvvv.pattern.adapter2;
//适配器
public class Adapter implements Target{
    private Adaptee adaptee;
    public Adapter(Adaptee adaptee){
        this.adaptee = adaptee;
    }
    @Override
    public void method1(){
        adaptee.method2();
    }
}
适配器
package com.vvvv.pattern.adapter2;
//被适配者
public class Adaptee{
    public void method2(){
        System.out.println("执行方法");
    }
}
客户端
package com.vvvv.pattern.adapter2;
//客户端
public class Client{
    public static void main(String[] args){
        Target target = new Adapter(new Adaptee());
        target.method1();
    }
}
缺省的适配器模式(AWT,Swing事件模型所采用的模式)
抽象目标角色
package com.vvvv.pattern.defaultadapter;
//抽象目标
public interface AbstractService{
    public void service1();
    public void service2();
    public void service3();
}
适配器(缺省的适配器)
package com.vvvv.pattern.defaultadapter;
//适配器(缺省的适配器,都空实现)
public class ServiceAdapter implements AbstractService{
    @Override
    public void service1(){
    }
    @Override
    public void service2{
    }
    @Override
    public void service3(){
    }
}
具体的实现类(具体的适配器)
package com.vvvv.pattern.defaultadapter;
//具体的实现类
public class ConcreteService extends ServiceAdapter{
    @Override
    public void service1(){
        System.out.println("执行业务方法");
    }
}
在awt中的应用(swing与awt事件模型所采用的模式)
package com.vvvv.pattern.defaultadapter;
import java.awt.Dimension;
import java.awt.Frame;
import java.awt.event.MouseEvent;
import java.awt.event.MouseMotionAdapter;
import java.awt.event.WindowAdapter;
import java.awt.event.WindowEvent;
public class AwtApp{
    public static void main(String[] args){
        Frame frame = new Frame("title");
        frame.addMouseMotionListener(new MouseMotionAdapter(){
            @Override
            public void mouseMoved(MouseEvent e){
                System.out.println("x: " + e.getX() + " y: " + e.getY());
            }
        });
        frame.addWindowListener(new WindowAdapter(){
            @Override
            public void windowClosing(WindowEvent e){
                System.out.println("关闭窗口");
                System.exit(0);
            }
        });
        frame.setSize(new Dimension(50, 100));
        frame.setVisible(true);
    }
}
命令模式
说明
意图:将一个请求封装为一个对象,从而使你可用不同的请求对客户进行参数化;对请求排队或记录请求日志,以及支持可撤消的操作。
作用, 命令模式的构成
1 客户角色:创建一个具体命令对象,并确定其接收者;
2 命令角色:声明一个给所有具体命令类的抽象接口。这是一个抽象角色,通常由一个接口或抽象类实现;
3 具体命令角色:定义一个接收者和行为之间的弱耦合,实现execute方法,负责调用接收者的相应操作;
4 请求者角色:负责调用命令对象执行请求;
5 接收者角色:负责具体实施和执行一个请求;
命令模式示例
抽象命令角色
package com.vvvv.pattern.command;
//命令对象
public interface Command{
    public void execute();
}
命令接收者
package com.vvvv.pattern.command;
//接收者
public class Receiver{
    public void doAction(){
        System.out.println("执行命令操作!");
    }
}
具体命令角色
package com.vvvv.pattern.command;
//具体的命令角色(关联到了接收者)
public class ConcreteCommand implements Command{
    private Receiver receiver;
    public ConcreteCommand(Receiver receiver){
        this.receiver = receiver;
    }
    @Override
    public void execute(){
        receiver.doAction();
    }
}
命令请求者
package com.vvvv.pattern.command;
//命令请求者(具体对命令的调用者)
public class Invoker{
    private Command command;
    public Invoker(Command command){
        this.command = command;
    }
//执行调用操作
    public void doInvokerAction(){
        command.execute();
    }
}
客户端
package com.vvvv.pattern.command;
public class Client{
    public static void main(String[] args){
        //接收者
        Receiver receiver = new Receiver();
        //命令
        Command command = new ConcreteCommand(receiver);
        //请求者
        Invoker invoker = new Invoker(command);
        //请求者请求
        invoker.doInvokerAction();
    }
}
组合模式
说明
Component(抽象构件接口)
– 为组合的对象声明接口;
– 在某些情况下实现从此接口派生出的所有类共有的默认行为;
– 定义一个接口可以访问及管理它的多个子部件;

Leaf(叶部件)
– 在组合中表示叶节点对象,叶节点没有子节点;
– 定义组合中接口对象的行为;

Composite(组合类)
– 定义有子节点(子部件)的部件的行为;
– 存储子节点(子部件);
– 在Component接口中实现与子部件相关的操作;

Client(客户端)
– 通过Component接口控制组合部件的对象;
组合模式示例
抽象构件接口
package com.vvvv.pattern.composite;
//抽象构件接口
public interface Component{
    public void doSomething();
}
组合类
package com.vvvv.pattern.composite;
import java.util.ArrayList;
import java.util.List;
//组合类(可以存放叶子与组合对象)
public class Composite implements Component{
    private List<Component> list = new ArrayList<Component>();
    public void add(Component component){
        list.add(component);
    }
    public void remove(Component component){
        list.remove(component);
    }
    public List<Component> getAll(){
        return this.list;
    }
    @Override
    public void doSomething(){
//遍历
        for(Component component : list){
            component.doSomething();
        }
    }
}
叶子结点
package com.vvvv.pattern.composite;
//叶子
public class Leaf implements Component{
    @Override
    public void doSomething(){
        System.out.println("执行方法");
    }
}
客户端
package com.vvvv.pattern.composite;
//客户端
public class Client{
    public static void main(String[] args){
        Component leaf1 = new Leaf();
        Component leaf2 = new Leaf();
        Composite comp1 = new Composite();
        comp1.add(leaf1);
        comp1.add(leaf2);
        Component leaf3 = new Leaf();
        Component leaf4 = new Leaf();
        Composite comp2 = new Composite();
        comp2.add(comp1);
        comp2.add(leaf3);
        comp2.add(leaf4);
        comp2.doSomething();
    }
}
组合模式的第二种实现
抽象构件接口
package com.vvvv.pattern.composite2;
import java.util.List;
public interface Component{
    public void doSomething();
    public void add(Component component);
    public void remove(Component component);
    public List<Component> getAll();
}
组合类
package com.vvvv.pattern.composite2;
import java.util.ArrayList;
import java.util.List;
public class Composite implements Component{
    private List<Component> list = new ArrayList<Component>();
    public void doSomething(){
        for(Component component : list){
            component.doSomething();
        }
    }
    public void add(Component component){
        list.add(component);
    }
    public void remove(Component component){
        list.remove(component);
    }
    public List<Component> getAll(){
        return this.list;
    }
}
叶子结点
package com.vvvv.pattern.composite2;
import java.util.List;
public class Leaf implements Component{
    public void doSomething(){
        System.out.println("执行方法");
    }
    public void add(Component component){}
    public void remove(Component component){}
    public List<Component> getAll(){
        return null;
    }
}